
Start Here
If your roof has Tigo optimizers on it, your panels are already reporting how much power each one makes. That information goes to Tigo’s box and, usually, to Tigo’s cloud. This project lets you keep a copy for yourself — on a small ESP32 board you buy for about $30, with its own web dashboard and a direct feed into Home Assistant. Nothing leaves your house, and there’s no subscription.
It only listens. It is wired so it physically cannot talk back to your solar equipment, so it can’t disturb anything.
What you’ll end up with
Section titled “What you’ll end up with”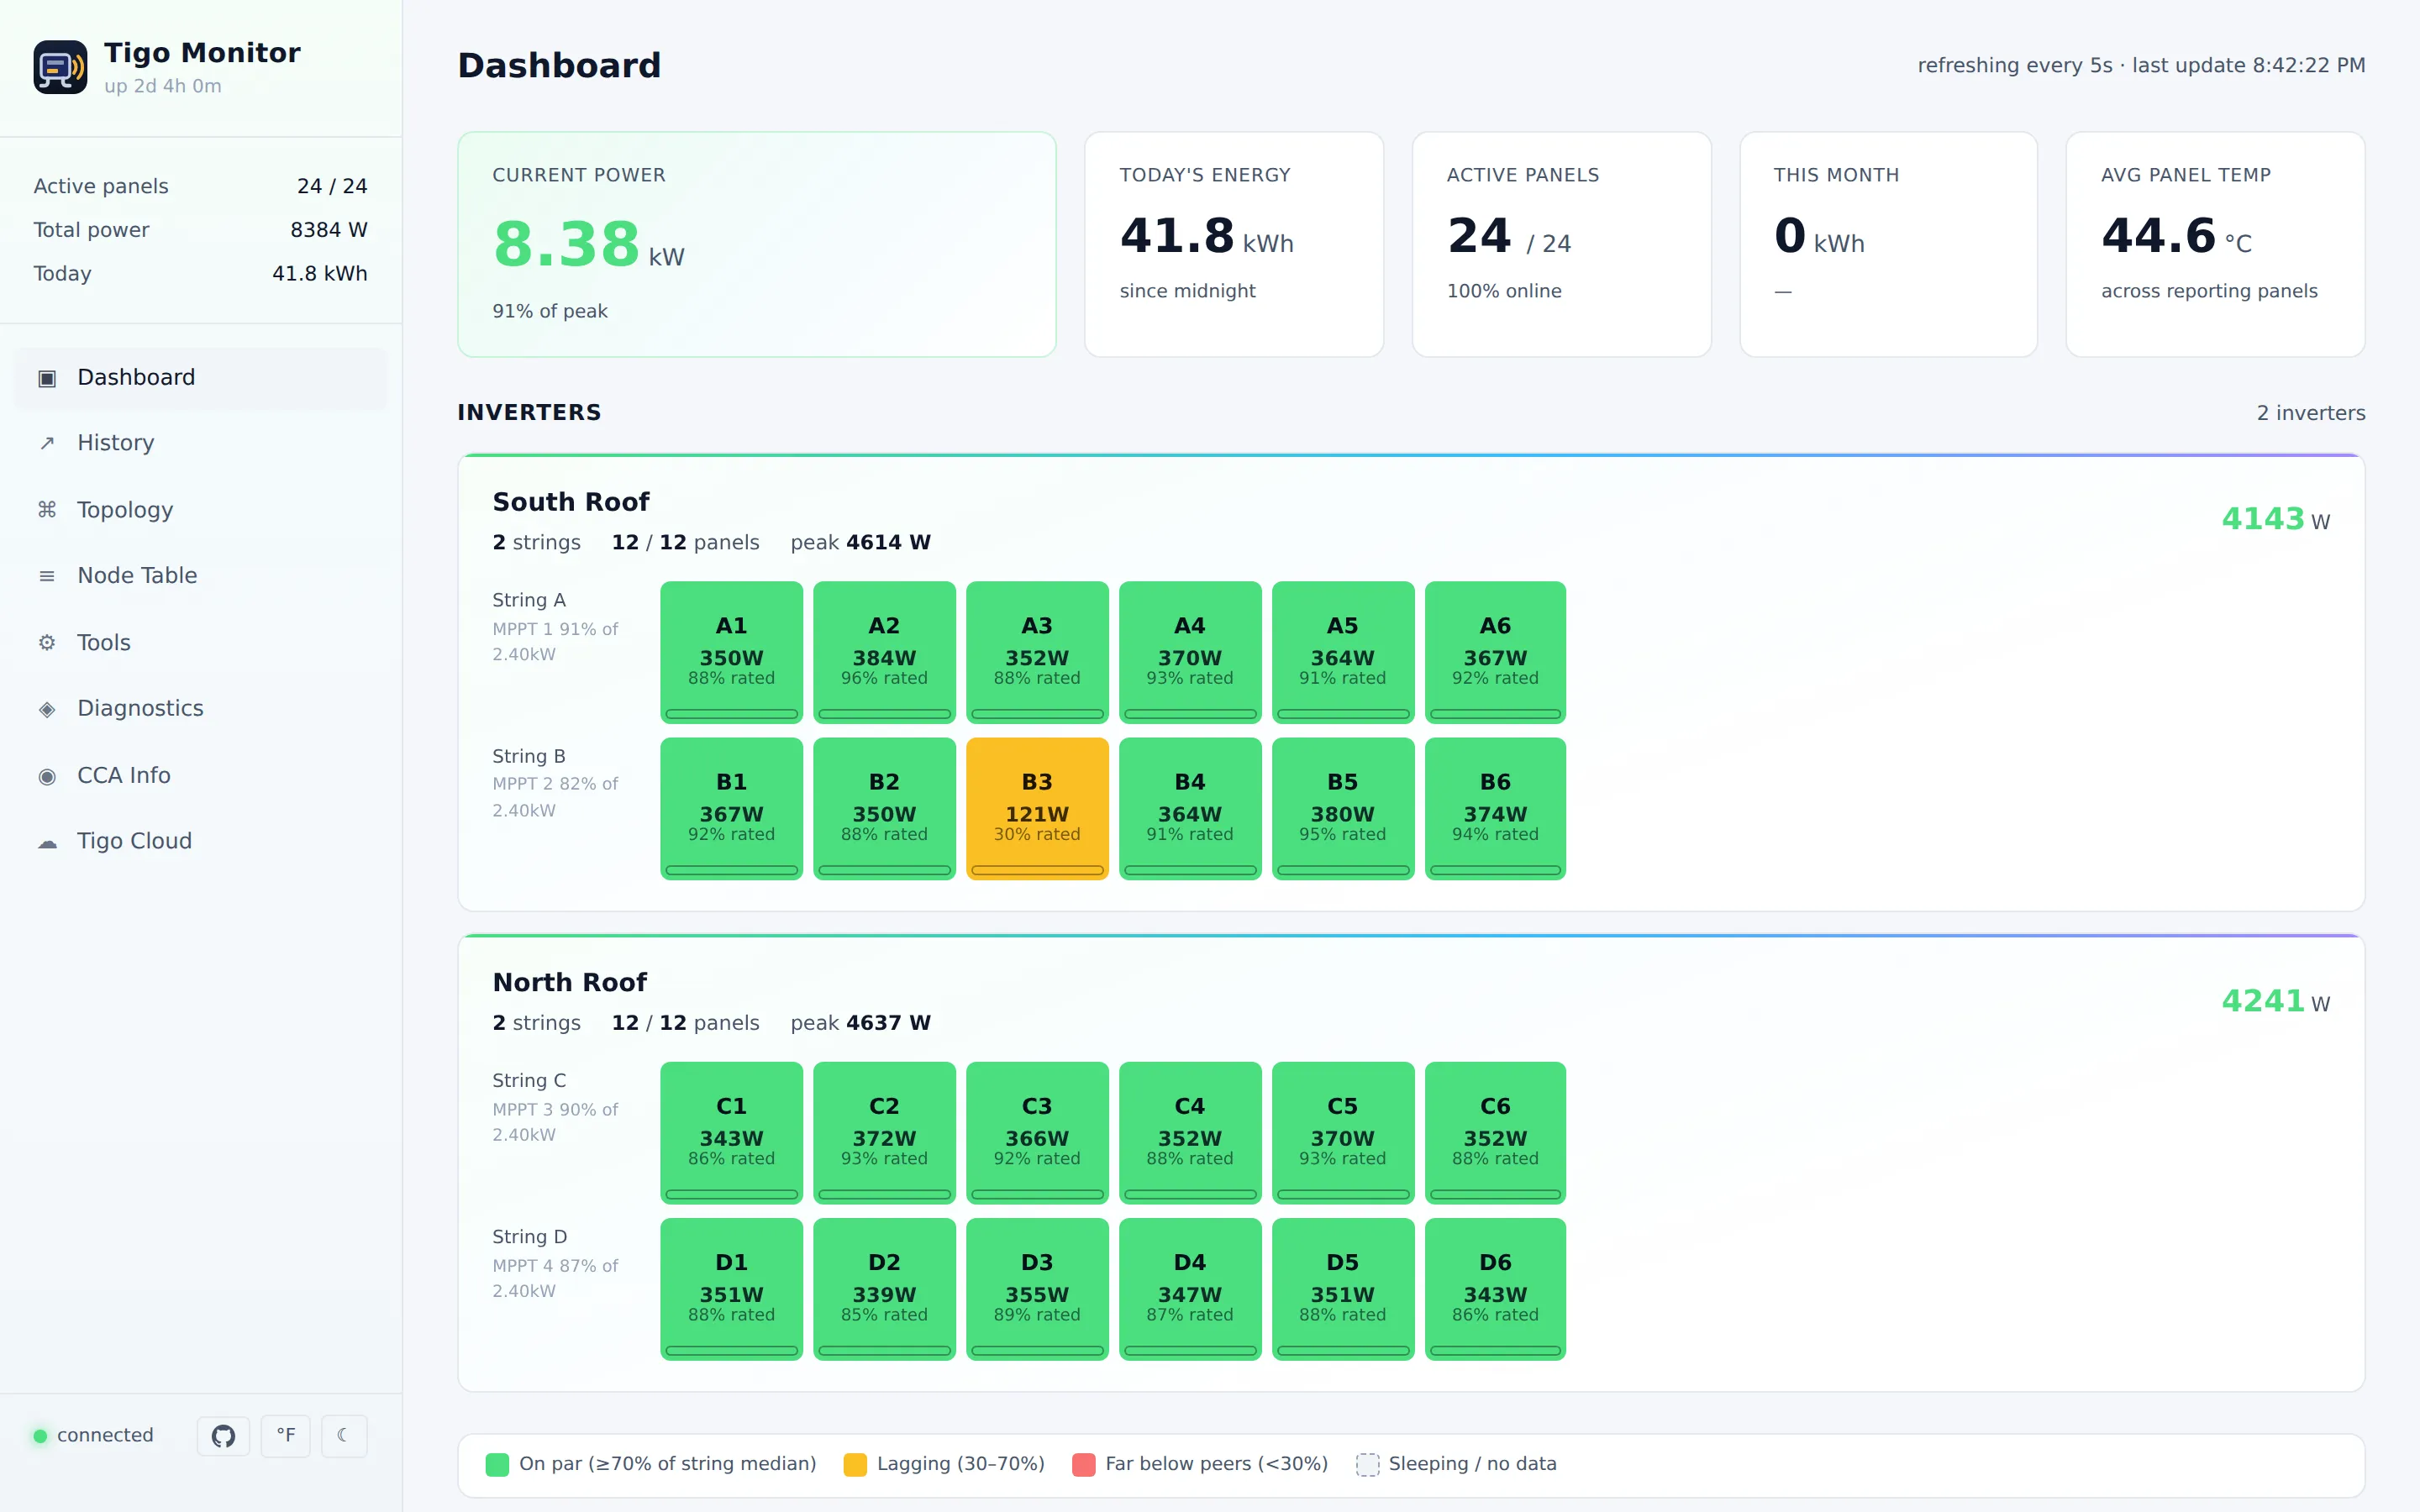
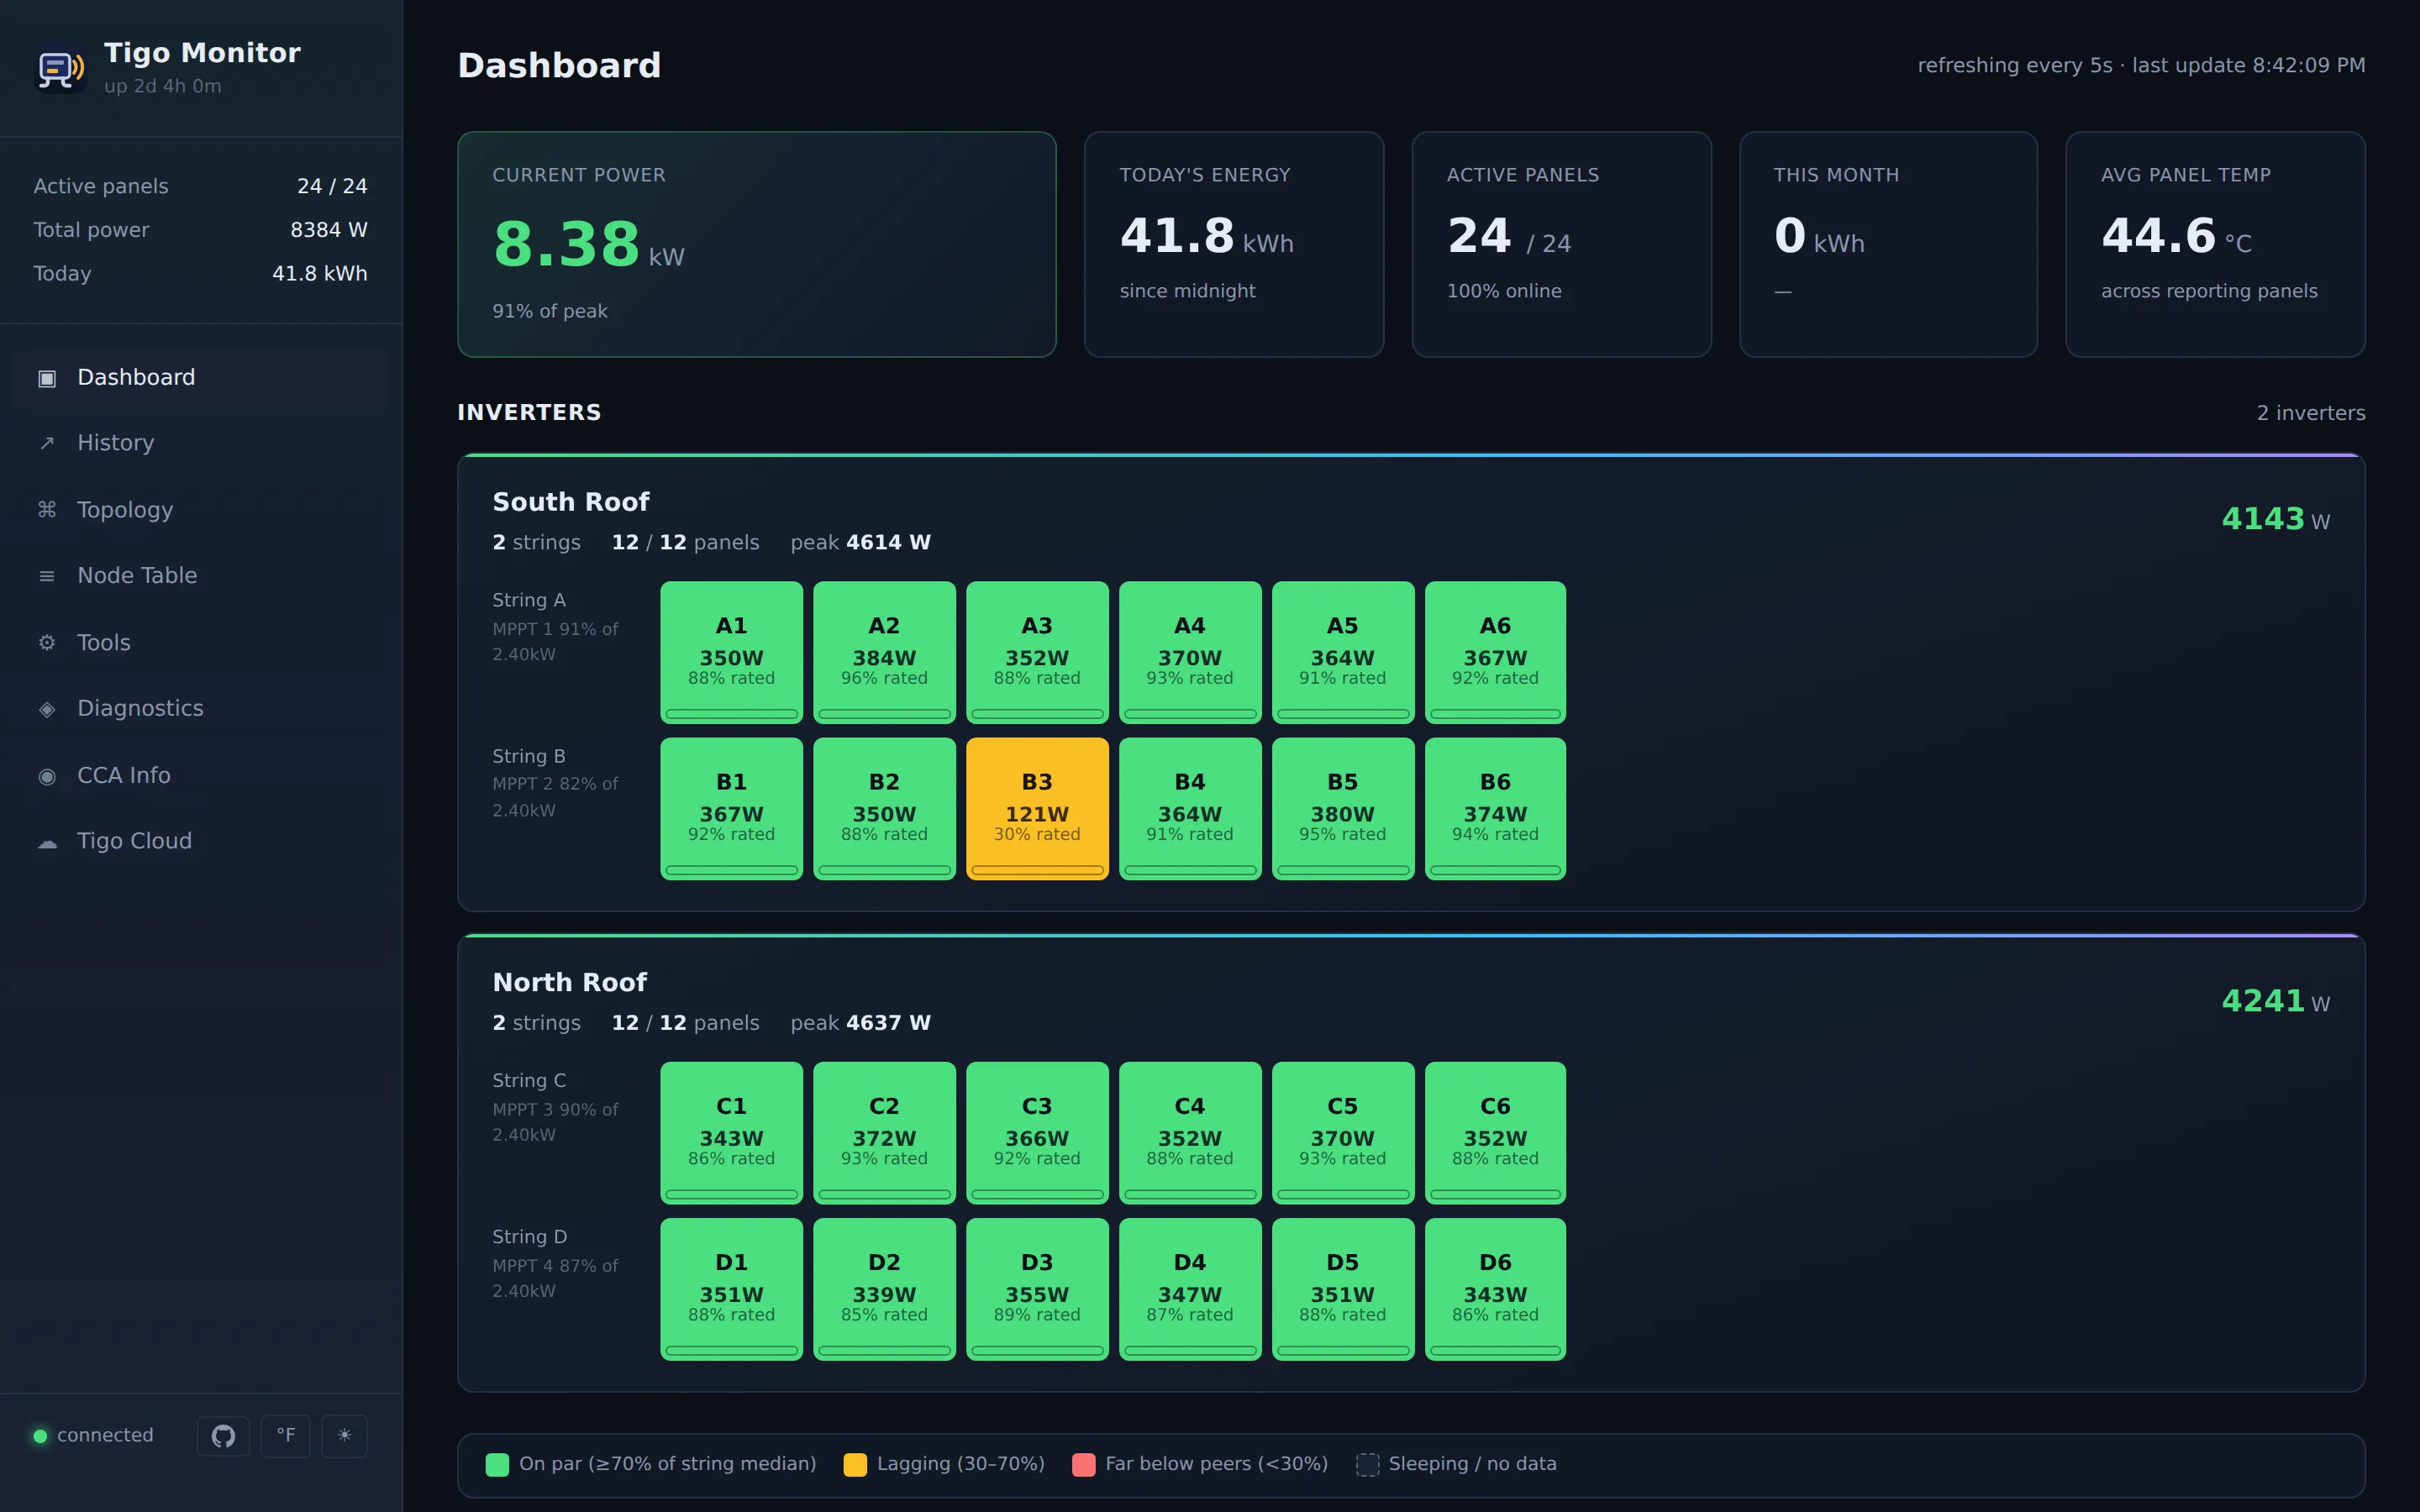
- A web page on your home network showing every panel individually — watts, volts, amps, temperature — updating live.
- Charts of today, this week, this month, and this year, stored on the device itself so they survive a power cut.
- Home Assistant sensors, including a feed for its Energy dashboard.
Words you’ll run into
Section titled “Words you’ll run into”Solar and Tigo documentation both assume you already know these. You don’t need to memorise them, but they’ll show up in the rest of the guides.
| Word | What it actually means |
|---|---|
| Optimizer | The small box clipped behind each solar panel. Tigo’s product. It’s what reports the per-panel numbers. |
| CCA | Tigo’s green wall box that collects from the optimizers and uploads to Tigo. Short for Cloud Connect Advanced. |
| TAP | A small Tigo radio antenna box that relays between the optimizers and the CCA. Some systems have one, some have several. |
| RS485 | The way your Tigo gear talks over that cable, on the two wires labelled A and B. This is the conversation we quietly listen to. |
| The Tigo cable | Four wires between the CCA/TAP and your optimizers: + and − carry power, A and B carry the data. You only tap A, B, and a ground — leave the power pair alone. |
| ESP32 | The little WiFi microcontroller board that does the listening. The AtomS3R is the one we recommend. |
| ESPHome | Free software that builds and installs the firmware onto that board for you. You’ll use it once at setup. |
| String | One row/chain of panels wired together. |
| MPPT | One input on your inverter. Usually one or two strings plug into each. |
| Frame | One short message on the RS485 cable. Each one carries one reading from one panel. |
| PSRAM | Extra memory on the ESP32. This project needs it, so buy a board that has it — the AtomS3R does. |
What to buy
Section titled “What to buy”For most people, two parts that click together:
| Part | Why |
|---|---|
| M5Stack AtomS3R (~$20) | The ESP32 board. Has the PSRAM this project requires, so it handles any size array. |
| M5Stack Atomic RS485 Base (~$10) | Snaps onto the bottom of the AtomS3R and lets it read the solar cable. |
| A few feet of twisted-pair wire | 22–24 AWG, to reach your CCA or TAP. |
You’ll also need somewhere to run ESPHome — the Home Assistant add-on is the easiest, but the command-line tool on a laptop works just as well.
Cheaper alternative: an ESP32-S3 dev board plus a MAX485 module. Make sure the board has PSRAM — it’s required, and plenty of cheap boards leave it out. See Wiring.
The five steps
Section titled “The five steps”1. Make it safe
Section titled “1. Make it safe”Before you open anything, shut down and isolate your solar array using your inverter’s DC disconnect. Solar panels in daylight keep producing lethal voltage even with the inverter switched off — turning the inverter off is not enough.
If that sentence made you uneasy, get a solar installer or electrician to do the wiring part. That’s a completely reasonable call and in some places it’s the law.
2. Wire it in
Section titled “2. Wire it in”Three short wires — A, B and ground — from your CCA or TAP over to the RS485 base. Nothing gets cut or unplugged: you’re hanging the board off a cable that stays exactly as it is, alongside everything already connected to it.
Ground is not optional. RS485 needs a shared reference or the readings won’t be reliable.
Full diagrams, terminal-by-terminal: Wiring guide.
3. Build your config file
Section titled “3. Build your config file”ESPHome needs a configuration file describing your board. Rather than writing one by hand, use the Config Builder — pick your board, answer a few questions, copy the result.
4. Flash it
Section titled “4. Flash it”Plug the board into your computer by USB and run:
esphome run my-tigo-monitor.yamlESPHome downloads everything it needs, builds the firmware, and installs it. The first build takes several minutes; later ones are quick. When it finishes it prints the device’s IP address.
The first flash has to be the wired one. Boards that store history use a custom
flash layout, and a device can only rewrite its own layout over the network if
the firmware already on it was built to allow that — a new board’s isn’t. Once
this config is installed, later updates go over WiFi: it sets
allow_partition_access: true, which is what permits the next layout change
without a cable.
Already running an older version? Two things to know.
Export your node table first — web UI → Nodes → Export. Changing the flash layout moves the region holding everything you’ve set on the device, and the old contents don’t move with it: panel names, inverter and string renames, per-string ratings, the settings under Tools, and a saved CCA address. Nodes → Import restores the lot afterwards, topology overrides included. Anything set in YAML comes back on its own.
Then flash over USB. An over-the-air update from 1.x won’t change the flash
layout, because the 1.x image predates allow_partition_access. USB is the
one-step route and the one to prefer.
If the board is awkward to reach, the wireless route takes three steps — and the middle one is easy to miss:
- OTA your current layout with
allow_partition_access: trueadded to theota:block and nothing else changed. This is the permission; it grants nothing retroactively, so it has to be its own update. esphome upload --partition-table your-config.yaml— this is the step that changes the layout. A plainesphome runnever sends a partition table, no matter whatallow_partition_accesssays. It will report success and leave your layout exactly as it was, which looks like it worked.- OTA the new firmware normally.
If step 2 reports an error, re-run it before rebooting the device — a partition
table caught mid-update leaves the board unable to boot, and recovering that
needs a serial cable anyway. --partition-table also requires the esphome
OTA platform; the web-server OTA path can only send firmware.
Either way stored history starts empty, and Home Assistant entities are unaffected.
The same applies later if you enable cca_source: ble on an 8 MB board — that
needs a bigger app slot, so it is another layout change, with the same three
steps and the same wipe. Export first.
5. Open the dashboard
Section titled “5. Open the dashboard”Go to http://<that-ip-address>/ in a browser.
Panels appear on their own over the first few minutes as each one happens to report in — this is normal, they take turns on the cable. At first they’ll have placeholder names like “Module 4F2A”. Naming them is the next step.
Putting names on the panels
Section titled “Putting names on the panels”Out of the box the device knows there is a panel, but not that it’s “South Roof 3”. There are three ways to fix that, in order of least effort:
- Import from Tigo’s cloud. Sign in with your Tigo account on the device’s
Tigo Cloud page and pull the layout your installer already set up. Needs
cloud_import: truein your config. - Read it from the CCA. If your CCA is on older firmware (before 4.0.4), the device can ask it directly over your network.
- Type them in. The Tools page lets you name everything by hand. Tedious with 30 panels, but it always works.
Details for all three: Configuration guide.
How to tell it’s working
Section titled “How to tell it’s working”Open the Diagnostics page on the device and look at two numbers:
- Active devices should match your panel count. Give it 10–15 minutes to find them all.
- Missed packets will always tick up slowly — that’s normal on a shared cable. If it’s climbing fast, see Reducing frame loss.
Then open the History tab. It fills one snapshot at a time, so it is empty for the first half hour no matter what — but if it reports that the device clock has not been set, that’s the thing to fix before anything else. Daily energy, the midnight reset and all stored history key off a real timestamp, and none of them works until the device reaches a time server. The usual cause is a static IP configured without a DNS server; see Static IP With No DNS.
Nothing showing up at all? Start with the Troubleshooting guide.
Where to go next
Section titled “Where to go next”| If you want to… | Read |
|---|---|
| See it in Home Assistant | Home Assistant |
| Change a setting | Configuration |
| Fix something | Troubleshooting |
| Keep long-term history on the device | Saving history to flash |
| Pull the data into your own scripts | Web server & API |